Lab 1 FGSM
In my first lab I'm going to explore the use of FGSM (fast gradient signed method) to generate adversarial examples for a LLM.
What is FGSM?
FGSM is one of the most famours adversarial attack methods. It is designed to trick a neural network by adding small, carefully-crafted noise (a perturbation) to the input with the goal of having the model misclassify the input.
Mathematically, FGSM works like this:
Where:
- is the original input image
- is the adversarial example
- is a small constant that controls the magnitude of the perturbation
- is the gradient of the loss function with respect to the input
- is the sign function that returns -1, 0, or 1 depending on the sign of the input
- represents the model parameters
- is the true label
The attack works by taking a step in the direction that maximizes the loss, thereby pushing the model toward misclassification.
Why does this work?
Neural networks make decisions based on patterns in the data. If we can find subtle ways to manipulate these patterns, we can cause the network to make incorrect decisions — essentially poking the model just enough to confuse it.
For example:
- An image of the digit "5" might be slightly altered so the model reads an "8"
The key is that the change is so small that the human eye cannot detect it, but the model misclassifies the image.
What are the real world implications?
FSGM shows that even the most sophisticated models can be fooled with a small perturbation. This has important implications for the security of AI systems. For example a potential attacker could use this method to:
- Confuse image classifiers in self-driving cars
- Bypass AI-based facial recognition systems
- Alter text to mislead AI-powered chatbots
Visual Example
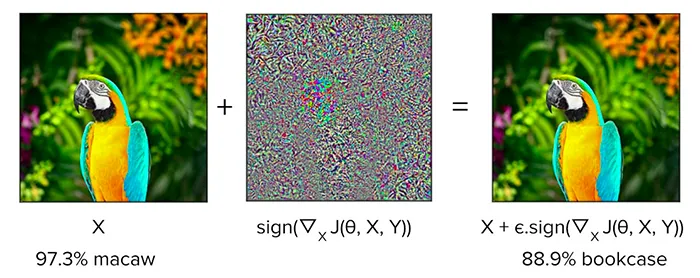
To better understand how FGSM works, let's look at a visual example:

In this image, you can see:
- The original input that is correctly classified, it correctly assumes that the image is of a "Macaw"
- The image sign, this is the perturbation that is added to the image to create the adversarial example. It often looks like a "negative" or abstract pattern. Almost like a heatmap, highlighting the areas that the AI relies on to make the decision.
- The resulting adversarial example that fools the model, it now incorrectly assumes that the image is of a "Bookcase"
What's fascinating is that to human eyes, the original and adversarial images look nearly identical, yet the model confidently misclassifies the adversarial example.
This demonstrates the fundamental vulnerability in how neural networks process information - they're sensitive to patterns that humans don't perceive in the same way.
The lab!
View the Lab RepositoryThe lab is a simple implementation of FGSM using a pre-trained LLM. It uses the MNIST dataset of handwritten digits to train a simple model and then integrates with tensorflow to generate adversarial examples.
The lab is split into two parts:
- Training a simple model on the MNIST dataset
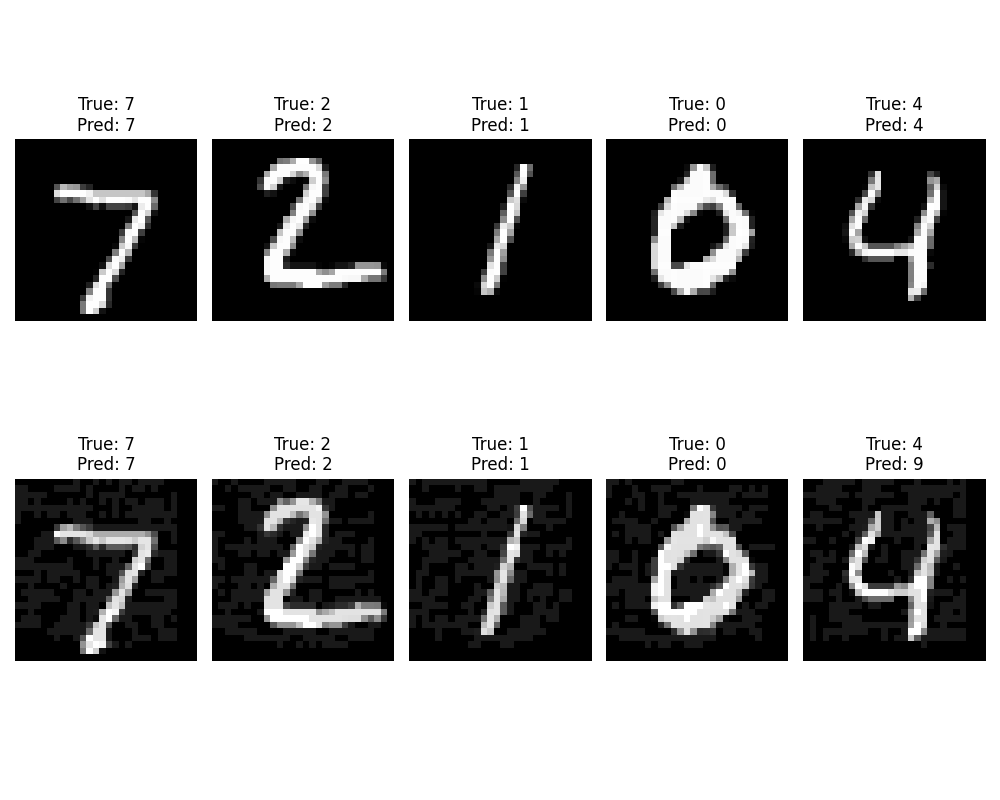
- Using the FGSM attack to generate adversarial examples
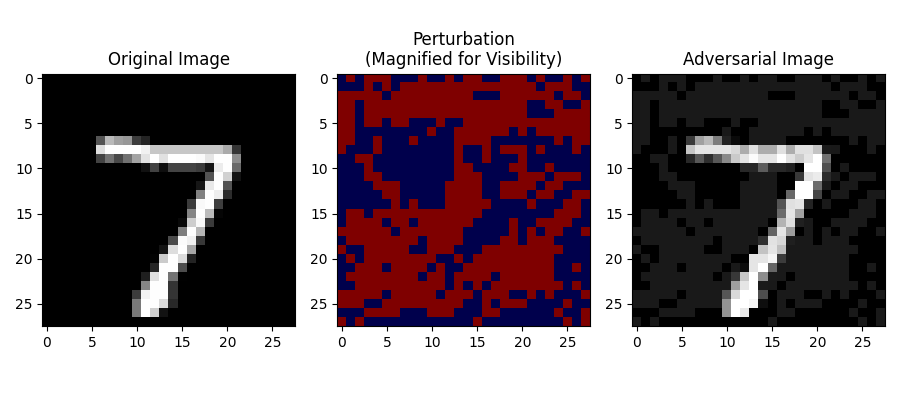
I have added a number of points of interest to help; it will print a number of messages based on progress. It will present the original image, the adversarial example and the perturbation to help visualise the attack and then will show the evaluation at the end.
Here is an example of the output:

$ python main.py
Original Prediction: 7
Adversarial Prediction: 3
How do you defend against this?
There are a number of ways to defend against FSGM attacks:
- Adversarial training: You generate FGSM-style perturbed images and train the model on both clean and adversarial inputs.
- Defensive distillation: You train a teacher model and use its soft probabilities to train a student model. It will smooth the decision boundary and make it more robust to adversarial attacks.
- Gradient masking: You can mask the gradients to make it more difficult for the attacker to generate adversarial examples.
- Input preprocessing: When accepting input you can preprocess it to adjust the pixel values to make it more robust to adversarial attacks. For example you can add small random noise to the input which dirupts the gradient enough to make it difficult for the attacker to generate an adversarial example.
I've added an example to the lab which uses the adversarial_training method to train a model on both clean and adversarial inputs. As you can see in the output below the model is now more resillient and can correctly identify the basic adversarial example as the same as the original image.

$ python resillience.py
Accuracy Comparison:
--------------------------------------------------
Original model on clean test data:
Accuracy: 0.9823

Original model on adversarial test data:
Accuracy: 0.9220

Adversarially trained model on clean test data:
Accuracy: 0.9842

Adversarially trained model on adversarial test data:
Accuracy: 0.8140

Improvement on adversarial examples:
-10.80% better accuracy